How to Do a Cut Crease: Step-by-Step Tutorial for Every Eye Shape
What Is a Cut Crease?
A cut crease is one of the most striking eye makeup looks you can create — a sharp, defined line that separates your lid color from your crease color, making your eyes appear larger and more dramatic. It's a staple technique for makeup artists and beauty lovers alike, and with the right tools, it's easier than you think.
Which Crease Shape Is Right for Your Eye Shape?
The Crease Piece's award-winning silicone crease shapes take the guesswork out of placement. Here's how to choose:
- Round Crease — Creates a doe-eyed, eye-opening effect. Perfect for monolids and smaller eyes.
- Almond Crease — Creates an elongated, sultry effect. Great for round eyes wanting more definition.
- Wing Crease — Combines a winged and elongated effect in one. Ideal for hooded or deep-set eyes.
What You'll Need
- The Cut Crease Creation Kit (includes your choice of crease shapes + handle)
- Classic Crease Brush Set (001, 002, 003, 004 brushes)
- A matte eyeshadow in a dark shade (for the crease) and a lighter shade (for the lid)
- A flat concealer brush + concealer to clean up edges
- Setting powder
Step-by-Step Cut Crease Tutorial
- Prep your lids. Apply an eyeshadow primer and a thin layer of concealer to your lids. Set with a translucent powder — this gives your eyeshadow something to grip and makes blending easier.
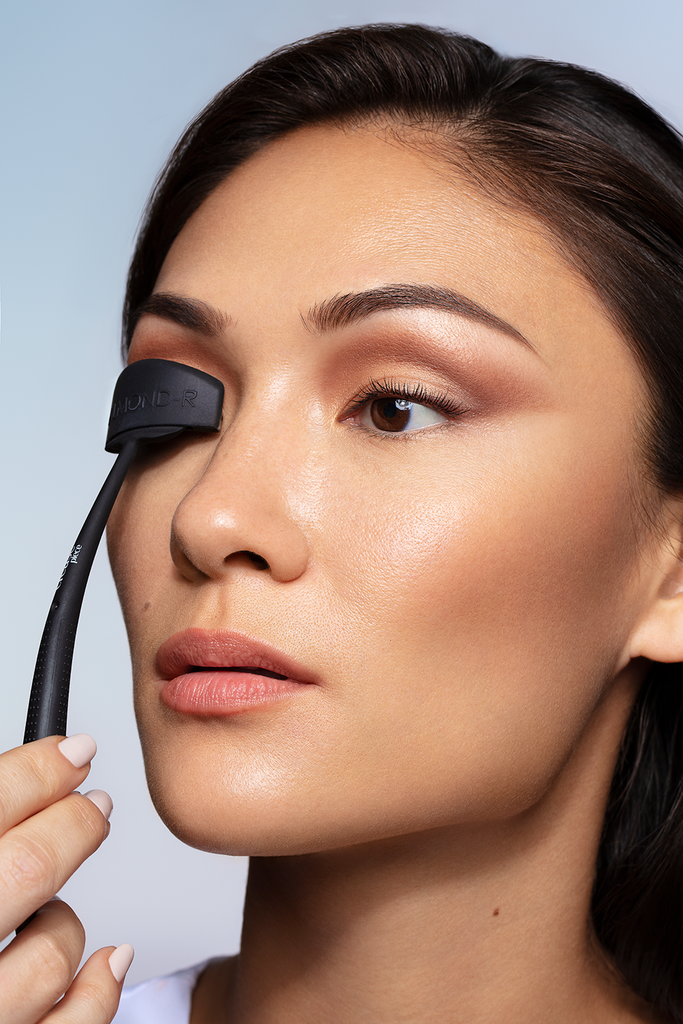
- Choose your crease shape. Select the Round, Almond, or Wing crease shape based on your desired effect. Snap it onto the Crease Piece Handle.
- Position the tool. Hold the crease shape against your eye, aligning the curved edge with your natural crease. The shape acts as a guide so your line is perfectly symmetrical every time.
- Apply your darkest shade. Using the 001 Brush, pack your darkest eyeshadow along the top edge of the crease shape. This creates the sharp cut line.
- Build dimension. Swap to the 002 Brush to buff and build color depth in the crease area, working in small circular motions.
- Blend the edges. Use the dome-shaped 003 Brush to seamlessly blend the crease color upward toward the brow bone, softening any harsh transitions.
- Diffuse the outer corners. The larger 004 Brush is perfect for diffusing color on the outer edges of the eye, eliminating any hard lines.
- Apply lid color. Pack a lighter or shimmery shade onto the lid below the cut crease line.
- Clean up the cut. Dip a flat concealer brush in concealer and trace along the bottom edge of your crease line to sharpen the cut and make it pop.
- Set and finish. Dust a little setting powder over the concealer to lock everything in place.
Pro Tips from Makeup Artists
- Work with a light hand and build color gradually — it's easier to add than to remove.
- Do your eye makeup before your foundation so you can clean up any fallout easily.
- The Crease Piece shapes are reusable and washable — rinse with warm water and mild soap after each use.
- As seen in BuzzFeed, Allure, and Montecristo Magazine — The Crease Piece is the award-winning tool that makeup artists trust.
Shop the Look
Ready to try it yourself? Everything you need is in the Cut Crease Creation Kit. Pair it with the Classic Crease Brush Set for a complete cut crease setup — cruelty-free, makeup artist approved.